
Introduction#
If you’ve ever captured a great photo only to find a stray object distracting from your composition, you’re not alone. Content creators regularly face the challenge of cleaning up visuals without leaving telltale signs of editing. This tutorial shows you exactly how to remove object from image with an AI-first workflow using Story321’s image-to-image editor, then covers pro finishing touches in apps like Photoshop or GIMP. You’ll learn how to craft effective prompts, choose the right model, and iterate quickly, so the removed area blends seamlessly with the scene.
By the end, you’ll know how to remove object from image so the result looks natural, prints well, and performs on social platforms—without hours of manual retouching.
Prerequisites/Preparation#
To follow this guide and learn how to remove object from image effectively, prepare the following:
- A modern web browser and stable internet connection.
- An image you want to edit (JPG or PNG; higher resolution offers better AI fill results).
- A free or registered account on Story321 (optional; registration can help you manage outputs and history).
- Optional: Access to Photoshop, Affinity Photo, or GIMP for fine-tuning.
- Basic familiarity with downloading and uploading files.
Nice-to-have knowledge:
- Understanding of composition, lighting, and textures helps you verify if your “how to remove object from image” results look realistic.
- Awareness of ethical considerations if you’re editing documentary, journalistic, or client-sensitive images.
Step-by-Step Instructions#
Below is the core process for how to remove object from image using Story321’s AI editing workflow. We’ll integrate recommendations and validation checks (“You will see…” and “At this point you should…”) so you can confirm progress.
1) Go to Story321’s Image-to-Image Editor#
1.1 Open your browser and navigate to: https://story321.com/image/image-to-image/
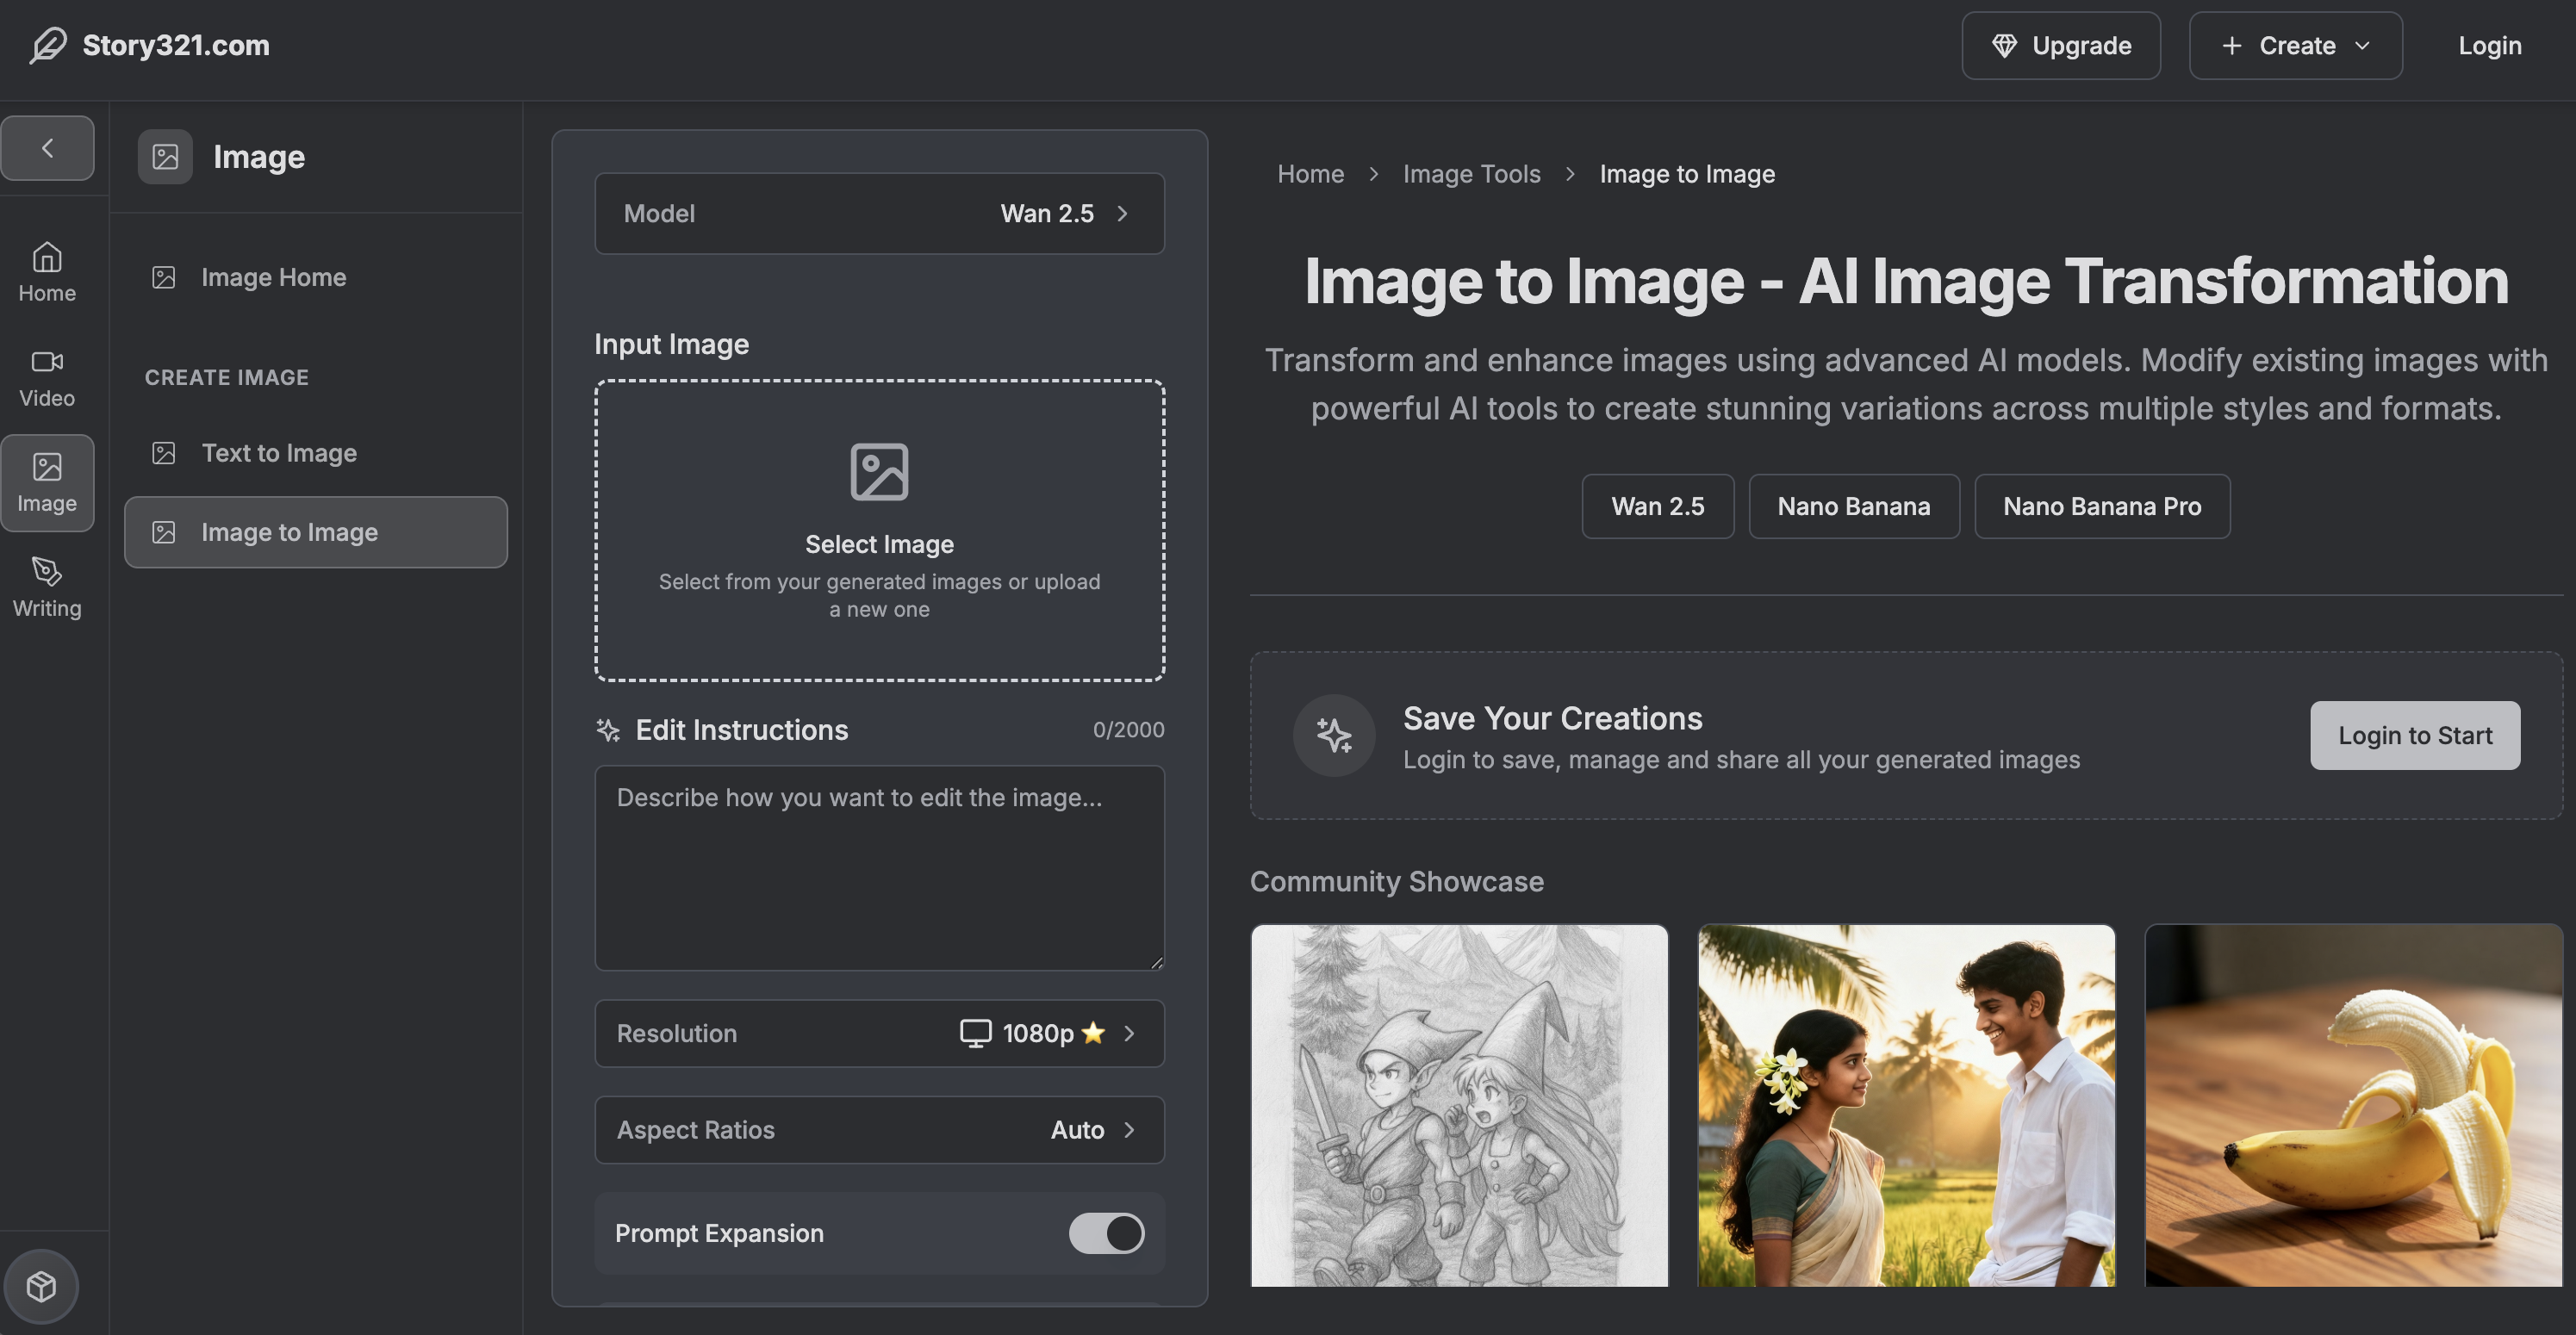
1.2 Confirm you’re on the correct page by checking:
- An upload area for your image.
- A “prompt” field (this is where you describe the object to remove).
- An “Edit Image” button.
- A right-hand pane labeled “My Images” that will display your generated outputs.
- An optional model selector that lets you switch AI backends.
You will see the primary interface, including upload and prompt areas. At this point you should be ready to import your photo.
2) Select/Upload the Image You Want to Fix#
2.1 Click the upload area or drag and drop your image into the interface. Choose the photo with the unwanted subject (person, sign, logo, pole, trash can, etc.).
2.2 Tips for the best starting point:
- Use the highest-resolution version of your image available.
- Avoid heavily compressed files if possible (less blockiness helps AI inference).
- For complex backgrounds (water, foliage, repeating patterns), larger images yield more believable fills.
You will see either a thumbnail preview or an upload progress indicator. At this point you should see your image ready in the editor.
3) Enter a Clear Prompt that Describes the Object to Remove#
This is the heart of how to remove object from image with AI. Instead of manual masking, you use language to tell the model what to erase and how to fill the space. Use specific, location-aware phrasing.
3.1 In the “prompt” field, type a direct instruction. Strong examples:
- “Remove the orange traffic cone on the right sidewalk and fill with asphalt texture that matches lighting.”
- “Remove the person in a blue jacket standing behind the bride; reconstruct the hedge.”
- “Remove the red water bottle on the desk; continue the wood grain pattern and keep reflections.”
3.2 Include environmental context when you can:
- Identify position: left, right, center, background, foreground.
- Name textures/colors: asphalt, brick, grass, water ripples, wood grain, cloudy sky.
- Indicate lighting/shadows: soft afternoon light, hard sunlight, indoor warm light.
3.3 Optional creative constraints:
- “Preserve shadows on the wall.”
- “Keep the window reflection intact.”
- “Maintain the repeating tile pattern.”
You will see your prompt text appear below or beside the image input. At this point you should have a precise, descriptive prompt that tells the system exactly what to remove and how the area should look.
Example prompts for how to remove object from image:
- “Remove the tripod in the lower left corner; replace with matching beach sand and footprints.”
- “Remove the exit sign above the door; fill with smooth painted wall and consistent shadowing.”
- “Remove the power line crossing the sky; reconstruct clouds and blue gradient.”
4) (Optional) Switch to a Different Image Editing Model#
Story321 lets you choose from multiple AI models. The default often works well, but challenging scenes can benefit from switching. The platform notes you can try other models, such as “nano banana,” for different reconstruction behaviors.
4.1 Locate the model selector in the interface. 4.2 Try the default model first. If results are imperfect, try alternatives like “nano banana” or any model labeled for inpainting or object removal. 4.3 Keep a note of which model handles your type of scene best (e.g., portraits, architectural lines, landscapes, product shots).
You will see the model name reflected in the UI. At this point you should be prepared to run variations if your first output needs improvement. This is key to mastering how to remove object from image with higher success rates.
5) Click “Edit Image” to Start Object Removal#
5.1 Once your image is uploaded and your prompt is ready, click the “Edit Image” button.
5.2 The system will begin processing. You might notice a spinner, progress bar, or an “in progress” indicator. Avoid closing the browser tab until it completes.
You will see a generation status appear, and the task will queue. At this point you should wait for the output to appear in the “My Images” list.
6) Wait for the Result in the “My Images” List#
6.1 As the AI finishes, your result will appear in the “My Images” panel on the right side of the screen.
6.2 The newest output typically shows up at the top (first item in the list). If you ran multiple requests, the most recent will still be first.
You will see the freshly generated image thumbnail at the top of “My Images.” At this point you should recognize your image with the target object removed.
7) Preview, Download, and Share the Edited Image#
7.1 Click the first image in the “My Images” list to open a pop-up viewer.
7.2 In the pop-up, review the result closely:
- Zoom in on the area where the object was removed.
- Check textures, edges, lighting, and repeating patterns.
- Confirm shadows/reflections look natural.
7.3 Download or share:
- Use the download button to save the edited file locally.
- Use the share option to copy a link or send it to collaborators.
You will see the image at full size and options to download/share. At this point you should have a usable output for your project.
8) Evaluate Quality and Iterate if Needed#
Even with AI, one pass isn’t always perfect. Iteration is the professional’s secret to mastering how to remove object from image.
8.1 If something looks off, try:
- Making your prompt more specific: name the color, shape, exact location, and how to fill the gap.
- Adding context about background textures: “extend brick wall with aligned mortar lines” or “continue marble veining.”
- Switching models as mentioned earlier (e.g., “nano banana” or other inpainting models).
8.2 Run variations:
- Slightly change the prompt and click “Edit Image” again.
- Save multiple versions and compare in your preferred viewer or in the pop-up.
8.3 Advanced iteration:
- If the object overlaps detailed textures (e.g., fence, tiled floor), you can crop the problem section, run removal just on the crop for a cleaner fill, then composite it back if needed.
You will see incremental improvements with each iteration. At this point you should identify a version where the object is cleanly removed and the scene looks natural.
9) Optional: Fine-Tune with Photoshop, Affinity, or GIMP#
If your AI output is 90% there, a quick manual pass can make it 100%.
9.1 In Photoshop:
- Use the Remove Tool or Content-Aware Fill to lightly refine edges.
- Use Healing Brush/Clone Stamp to fix small artifacts or pattern mismatches.
- Nudge tones with Curves/Levels or Hue/Saturation to match the surrounding area.
9.2 In GIMP:
- Install Resynthesizer (for a Content-Aware-like fill) if needed.
- Use Heal/Clone tools to fix seams and textures.
9.3 Keep edits on a separate layer to preserve flexibility.
You will see micro-improvements—cleaner edges, consistent textures, and better tonal harmony. At this point you should have a result that stands up to close inspection.
10) Export and Organize#
10.1 Save your final image:
- For social/web: JPG at high quality or WebP.
- For print/archive: PNG or TIFF.
- Keep a versioned filename (e.g., photo_beach_no-cone_v3.jpg).
10.2 Consider embedding basic metadata or notes about the edit for your internal documentation.
You will see your final deliverable organized alongside previous iterations. At this point you should be ready to publish or deliver to clients.
Tips & Best Practices#
These practices help you consistently succeed at how to remove object from image:
- Be explicitly descriptive in prompts: Identify the object by color, material, and position. “Remove the yellow sign on the left brick wall; extend the brick pattern and match mortar color.”
- Reference lighting and perspective: AI fills look more natural when you mention soft vs. hard light and direction.
- Use high-resolution sources: More pixels mean the model can infer textures and edges better.
- Iterate with model selection: Some models excel at faces; others at patterns. If your first pass fails, switch models before giving up.
- Keep artifacts small: If the area is complex, zoom in post-edit and patch minor issues with a Healing Brush or Clone Stamp.
- Watch for shadows and reflections: If you remove an object casting a shadow, also remove or recreate the shadow logically.
- Maintain realism: If removing an object changes the story (journalism, product listings, property photos), get approvals and disclose edits when appropriate.
- Save versions: Keep earlier outputs so you can revert if a new attempt introduces new artifacts.
- Check at multiple zoom levels: 100% for texture detail; fit-to-screen for overall believability.
- Mind edges and repeating patterns: Brick, tile, fabric, and fences reveal sloppy fills. Call out “aligned pattern” or “consistent grout lines” in your prompt to improve results.
Troubleshooting#
If your first attempt at how to remove object from image isn’t perfect, try the following:
-
The object is still faintly visible
- Cause: Prompt too vague or model hesitated on strong removal.
- Fix: Specify position and color; add “completely remove,” “no remnants,” and detail the replacement texture. Try a different model.
-
Smudged or smeared background where the object was
- Cause: Complex background (water ripple, detailed foliage) or low-res source.
- Fix: Use a higher-res image, tighten the prompt with texture keywords, or run a second pass focusing solely on that region.
-
Repeating patterns look misaligned (tiles, brick, textiles)
- Cause: AI reconstruction not pattern-aware enough.
- Fix: Include “aligned pattern,” “straight grout lines,” or “consistent brick rows” in your prompt. Alternatively, refine with Clone Stamp in a raster editor.
-
Faces or text nearby become distorted
- Cause: Aggressive inpainting affecting adjacent content.
- Fix: Narrow the ask in your prompt (e.g., “remove only the soda can on the desk, preserve the book title and hand”), or crop the region and run removal on the smaller section.
-
Generation is slow or times out
- Cause: High load or connectivity issues.
- Fix: Refresh the page and retry, test a smaller image, or try again later. Close extra tabs and ensure your connection is stable.
-
Output quality varies wildly
- Cause: Model mismatch.
- Fix: Switch to another model (e.g., “nano banana” or others intended for inpainting). Keep notes on which model handles your use case best.
-
Downloaded image looks different from the preview
- Cause: Browser color management or scaling differences.
- Fix: View in a color-managed app (Photoshop, Lightroom) and verify at 100% zoom.
-
Ethical concern about editing reality
- Cause: Removing objects can alter context.
- Fix: If working in journalism, documentary, scientific, or legal contexts, follow relevant ethics codes. Label the image as edited when transparency matters.
Frequently Asked Questions (FAQ)#
Q1: What is the fastest way to learn how to remove object from image? A: Use an AI tool like Story321’s image-to-image editor. Upload your image, type a precise removal prompt, and generate. Iterate with model switching as needed, then do minor touch-ups in Photoshop or GIMP if necessary.
Q2: Do I need Photoshop to remove objects? A: No. This tutorial focuses on how to remove object from image with Story321’s AI. Photoshop or GIMP can be used for final refinements, but AI often gets you 80–95% of the way in one click.
Q3: What kind of prompts work best? A: Be specific: “Remove the red umbrella in the foreground; extend wet cobblestone texture, keep reflections, match night lighting.” Specific color, location, and replacement texture dramatically improve how to remove object from image.
Q4: Can I remove multiple objects at once? A: Yes. In your prompt, list them clearly: “Remove the two traffic cones on the right and the backpack on the bench; continue pavement texture.” If results are inconsistent, remove objects in separate passes.
Q5: How do I handle complex backgrounds like water or foliage? A: When learning how to remove object from image in complex scenes, include texture cues: “continue gentle water ripples,” “natural leaf clusters,” “consistent depth of field.” Iterate with model switching and refine with a healing brush if needed.
Q6: Will the resolution decrease after editing? A: Typically, the output matches your uploaded size. For critical work, verify image dimensions post-download. If you need larger outputs, upscale after editing with a high-quality upscaler.
Q7: Is there a way to batch process images? A: Story321’s interface focuses on single-image edits. For volume work, consider scripting in desktop software or using APIs. You can still streamline how to remove object from image by creating repeatable prompts and a consistent review workflow.
Q8: Can I do this on mobile? A: Yes, via a mobile browser. Upload from your camera roll, type a prompt, and generate. For detailed inspections, zoom in and download to a desktop for a final check.
Q9: Is it ethical to remove objects from images? A: For creative or commercial work, it’s common. For journalism, documentary, scientific, or legal imagery, follow strict standards. Disclose edits when accuracy and transparency matter.
Q10: What if the result looks too perfect or uncanny? A: Subtle imperfections are part of reality. Add realism back by lightly reintroducing noise/grain, or blend transitions with a small, soft healing brush to avoid plastic-looking surfaces.
Summary#
Mastering how to remove object from image doesn’t require advanced manual retouching anymore. With Story321’s image-to-image editor, you can upload, describe what to erase, choose the right AI model, and generate a clean, believable result in minutes. When needed, a quick touch-up pass in Photoshop or GIMP can polish edges and textures. By crafting precise prompts, iterating with different models, and verifying details like lighting, shadows, and patterns, you’ll create images that look as though the unwanted object was never there.
Step Recap (User Topic Integration)#
- Go to https://story321.com/image/image-to-image/
- Select/upload an image.
- Enter a “prompt” to indicate the object you want to remove.
- Click “Edit Image.”
- Wait for the generated result in the “My Images” list on the right.
- The newest image appears first—click the thumbnail to open a pop-up and view, download, and share.
- If needed, switch to other models (e.g., nano banana), refine your prompt, and re-run.


